CREATE YOUR OWN
VR APPS ONLINE!
START NOW!
VR APPS ONLINE!

This technology has become mainstream thanks to the widespread availability of modern virtual reality hardware. 360-degree videos and other VR applications, however, are still regarded as innovations and can be used for marketing purposes.
So how can you create a 360-degree video? Here you will find out in detail how this works.
Table of Contents
360-degree videos are videos that allow the viewer to look in all directions. We also speak ofimmersive videos”, since the user is completely immersed in the virtual world presented to them.
It is deemed an interactive medium since the user can decide where to look for themselves. But that’s not the only reason: A virtual reality app can also integrate interactive hotspots that the user can select within this application, such as web links, videos or texts.
360-degree videos are most impressive when viewed with VR glasses (Head Mounted Display). However, you can also watch such 360-degree videos in a web browser or on social networks.
360-degree videos are especially suitable for trade fairs – they offer users a memorable experience and leave a long-lasting impression. With virtual reality experiences, you can firmly anchor lasting memories in users’ minds. And last but not least, such an item can be used to demonstrate innovativeness – something that is highly appreciated.
However, a 360-degree video is not only ideal for use at trade fairs: 360-degree videos are also used on websites, in showrooms or on social networks to offer users, fans and potential customers exciting interactive VR experiences.
For this reason, 360-degree videos are still an eye-catching innovation that is well received by users and can be used effectively for marketing purposes. By the way, there is also a light version of immersive videos: 180-degree videos! As the name suggests, these span 180 degrees.
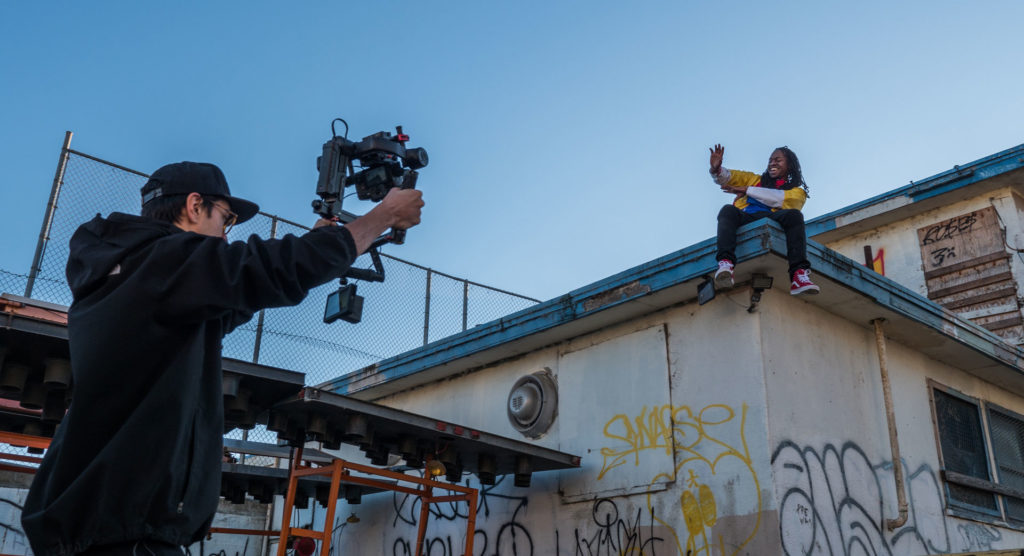
Shooting 360-degree videos is rather different from shooting conventional videos and movies. One of the biggest differences to a classic film shoot is:
360-degree videos offer the viewer a freely selectable 360-degree view across the camera angle. An all-round perspective like this can only be achieved professionally if either a special omni-spherical camera or a multi-camera rig is used. Such rigs, in which several identical cameras are used, are now available for several popular cameras, such as lots of GoPro models.
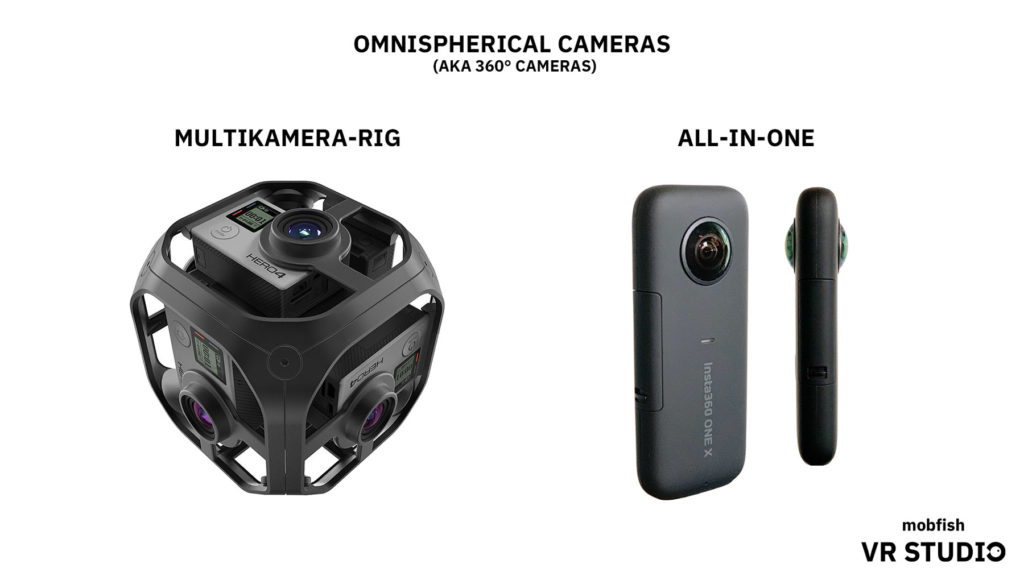
Many different cameras are suitable for shooting 360-degree videos. Professional studios work either with the omni-directional cameras mentioned above, or with multi-camera rigs. Such solutions enable particularly high-quality videos, which can ultimately be explored and experienced immersively with a high level of detail.
In the majority of cases, the choice between the two solutions depends on the budget. Studios that also produce conventional films in addition to 360-degree videos often have several identical cameras.
The purchase of a multi-camera rig for such film productions usually works out cheaper than an omni-spherical camera, which is only used for shooting 360-degree videos. However, they do have to accept the manual stitching work.
However, omni-spheric cameras are worth considering for companies or cameramen that want to specialize in films for VR applications. Shooting with such cameras is usually easier to handle than multi-camera rigs, at least in terms of functionality and usability.
Even if you just have a small budget, there are still some good possibilities for shooting 360-degree videos. For example, providers such as Insta360 have action cameras that are both affordable and deliver astonishingly good quality.
These cameras can capture up to 5.7K at 30 fps (frames per second). The Insta360 cameras also offer what is known as ‘Flow State’ image stabilization, which works amazingly well.
With the GoPro Fusion, GoPro has also launched a VR-suitable action cam on the market that allows recordings up to 5K.
As a further provider, Samsung has recently been able to offer the Gear 360, which allows 360-degree videos to be shot at an acceptable level. With a weight of only 152 grams and smartphone compatibility via Bluetooth, the Samsung Gear 360 is an ideal solution for beginners.
As you can see, there has long been a large selection of 360-degree cameras on the market catering for different budgets. We have also examined some models for you and created a 360-degree camera test.
The rapid development of smartphones has brought many improvements, especially in terms of camera quality. The quality of smartphone cameras has long been sufficient to create HD and 4K videos.
360-Degree Camera Attachment for the iPhone
However, smartphones are only partially suitable for shooting 360-degree videos. The best results can be achieved using camera attachments. However, there are only a few models that actually produce usable results. Many cheap models are simply not worth the money.
One of the few cameras that makes it possible to create a usable VR experience with a smartphone is the Nano by Insta360. With the launch of the Nano, the provider specializing in 360-degree cameras has developed an attachment for the iPhone that can be used to make films. Purchase price is 239 euros.
Without a Camera Attachment: 360-Degree Photos as an Alternative
If you don’t have a camera attachment like the Nano, you can’t create 360-degree videos with your smartphone. However, you can still take 360-degree photos. To do so, use the Panorama 360 camera app, available for both Android and iPhone.
These apps make it possible to create panoramic images, which then generate a 360° panoramic view. However, the photos from the example app are not real 360° images that allow you to look in all directions. Photos taken with a conventional mobile phone camera can only be viewed on the horizontal axis. However, this app should also support all 360° camera models!
Once you’ve decided on the equipment you’ll use to shoot, it’s time to think about implementation. When shooting a classic film, you basically only have to keep an eye on the area that the camera is actually capturing. Everything happening behind the camera can more or less be ignored.
But:
Since 360° videos film the entire environment all the way round, you have to be even more careful not to make any slip-ups or have unwanted objects or people in the picture. This can sometimes present a real challenge for filming. You should consider this potential difficulty in advance and include it in your planning.
If it is not possible to optimally prepare the entire environment for the shoot, there is another possibility for shooting VR videos: the 180° degree format mentioned above.
Shooting 360-degree videos differs considerably from conventional filmmaking. There are six basic things that you have to pay attention to in order for the 360° video to be really successful.
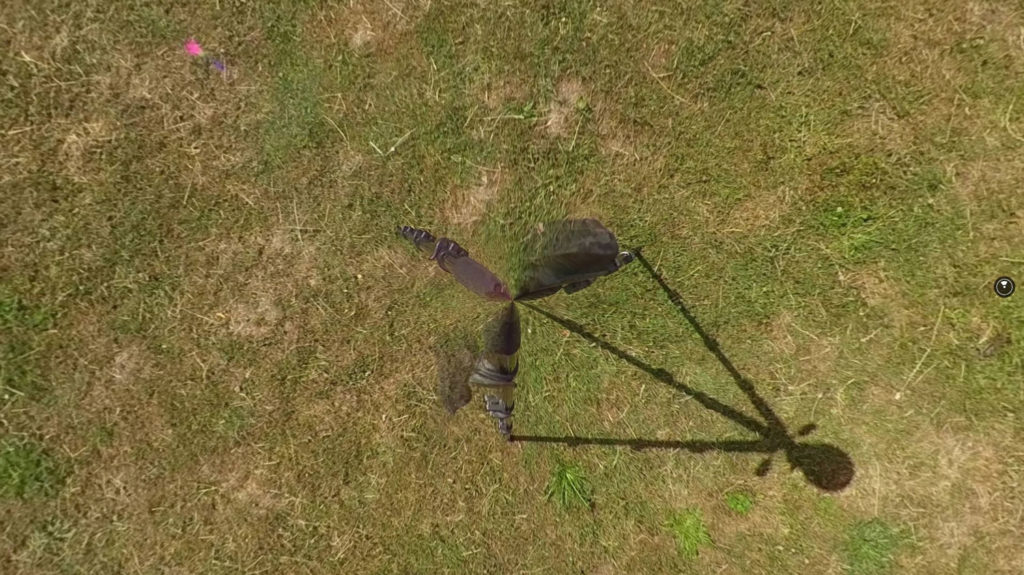
One of the most common unwanted artifacts that appear repeatedly in 360-degree videos are shadows caused by the tripod or unattractive tripod legs in the picture. Depending on the position of the sun, these appear more or less prominently in the lower part of the images.
These artifacts can usually be greatly reduced by using the right tripod. The ideal tripods for shooting 360-degree videos are those with just one leg.
This is quite a contrast to the three-legged tripods that are commonly used to shoot films, providing better stability for film cameras. And this is exactly where the disadvantage of one-legged tripods can be seen: they sometimes run the risk of falling over if it is windy.
Get the right perspective depending on the scene:
A phenomenon that goes hand in hand with virtual reality is motion sickness. This has to do with the fact that the signals sent via the eyes to the brain indicate that the body is moving even though you are actually standing still. This kind of nausea experienced by the viewers usually occurs when the camera perspective moves too much.
In order to prevent inexperienced VR users in particular from motion sickness, you should avoid moving the camera as much as possible and rely primarily on static shots.
Nowadays, many film formats rely on very fast cuts and rapid scene changes, which generally makes the film more dynamic. With 360-degree videos, however, this is usually too much of a good thing.
This is because with every new scene the user needs some time to find their way around the new environment. Make sure you avoid placing the user in new rooms every two seconds.
After a scene has changed, it’s far better to allow some time to pass before the plot progresses. This way, the viewer can look around and find their way in the new scene.
As a general principle, you should not pack several simultaneous actions into one scene. An example of this would be: someone in front of the user explaining the particular dance that is currently being performed behind the user. This only causes confusion and ambiguity about where the viewer should direct their attention.
Instead, it is better to guide the user. In this example, a far more elegant solution would be for the person doing the explaining to move in the direction of the dance being performed. Arrows or other hints to steer the gaze are usually clumsy and should be avoided.
In addition, the person should not have to move too far in one direction. If, for example, the viewer is sitting on a sofa, it would be extremely uncomfortable if they had to turn their head 180° to capture the entire experience.
For this reason, it makes sense to let the action take place in the front 180°, even in a 360° video.
Experienced filmmakers are well aware of the importance of audio in film. This is especially true for 360° videos. However, accommodating high-quality sound technology is a real challenge in 360° scenes where the complete set is in view.
In general, clip-on microphones and the like are best suited for a 360-degree video set. If additional audio equipment is required, it must be hidden under the camera. For example, boompoles cannot be used for this form of film, since they would end up appearing somewhere in the upper field of vision as unwanted artifacts.
Spatial sound
In order to create a 100% convincing VR experience, the sound must also be adjusted according to the entire 3D environment. The sound should come from the direction of the actual source. This results in an immersive audio experience that perfectly complements the visual all-round field of view. When taken as a whole, this offers the perfect VR experience.
In order to achieve this, you should make sure as far as possible that every important sound source is recorded in its own channel. This way, you will have all possibilities for exact positioning in post-production.
If you don’t want to do post-production, you can also use some of the various spatial sound recorders. These record audio from all directions.
If you have the right equipment and are prepared for the shooting, you have a good chance of producing something excellent. This can then be further transformed into an extraordinary VR experience. By implementing some further tricks and tips, you can make the 360-degree self-made videos even better.
For example, YouTube’s Creator Academy has made its own tutorial explaining how to shoot 360-degree videos – you can learn a lot from this! A good example of how not to shoot 360-degree videos can be found in the following video:
These tips are certainly nothing new for professionals, as they also largely apply to conventional films. However, beginners should definitely internalize these points in order to achieve good results.
The YouTube heatmap study focuses on an amazing aspect of VR videos. It shows that viewers watching 360-degree videos spend 75% of the time in the front, central 90 degrees of the video. For this reason, it’s definitely worth keeping the film’s main storyline in this area.
360-degree videos are a new medium and will grow in importance in the coming years. Since this format is only in its infancy, you can let your creativity run wild and experiment to your heart’s content. If you pay attention to the most important things on the set and rely on the right cameras, nothing stands in your way of creating a successful first production.
Register for free and start editing!


Very helpful to understand the changing technology… Thankyou